Release 6.0
Available from TallyPrime Release 6.0, Connected Banking makes your banking tasks simpler. With Connected Banking, you can get Bank Statements and Bank Balance right from TallyPrime. This saves you a great deal of time that you can utilise for more important tasks of your business.
To get started with Connected Banking, you need the following:
- Active license
- Valid TSS
- Tally.NET ID or a valid e-mail address
- Valid 10-digit mobile number for linking with your Tally.NET ID and receiving OTP
Set Up Connected Banking
As a one-time setup for Connected Banking, you need to do the following:
- Link a mobile number to your Tally.NET ID.
- Change your Tally.NET password, if it does not meet the latest password policy.
- Connect your bank accounts to TallyPrime.
Link mobile number to Tally.NET ID
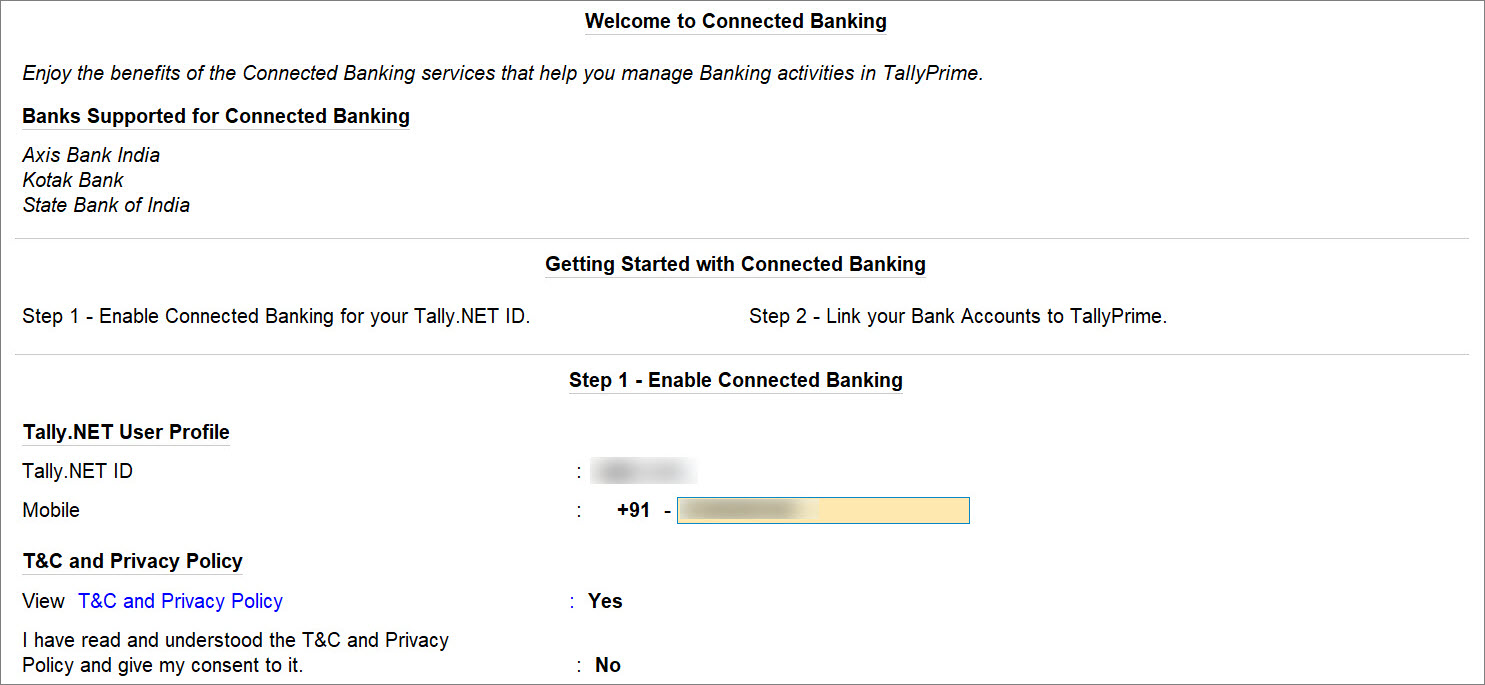
- Press Alt+Z (Exchange) > All Banking Options > Login & Logout.
- In the Log In to Connected Banking screen, enter your Tally.NET ID.

If you are working with multiple users under a license site, then refer to Approve User Access to Connected Banking for non-admin users.
- Enter your Tally.NET password.

- Enter the mobile number that you want to link to your Tally.NET ID.

- View T&C and Privacy Policy: Yes.
You will get redirected to the web page where you can read the T&C and Privacy Policy and then accept it. - Enter the OTP received on your mobile number.
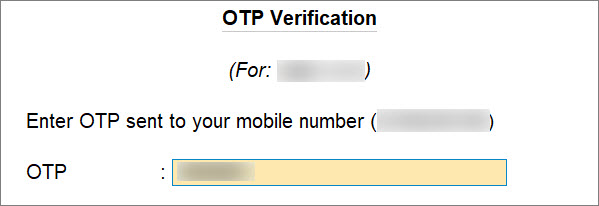
If you do not receive the OTP, press Alt+R (Resend OTP).
The mobile number gets linked to your Tally.NET ID.
As a result, you get logged in and can use the Connected Banking services.
You can proceed to connect your bank accounts to TallyPrime.

If your password does not meet the new password policy introduced for Connected Banking, then you will need to change the password.
If you want to know how to link mobile number to Tally.NET ID on the Tally Solutions Customer Portal, then click here
Approve User Access to Connected Banking for non-admin users
In case of multiple users under a license site, as an admin, you need to enable Connected Banking for the non-admin users. Once you approve the users using your Tally.NET credentials, they can use the Connected Banking services.
If you are a non-admin, then the approval request goes to the admin. The admin can then approve user access to Connected Banking either in TallyPrime or on the Tally Solutions customer portal.
- Press Alt+Z (Exchange) > All Banking Options > Login & Logout.
The Log In to Connected Banking screen appears. - Enter your Tally.NET ID.
If the Tally.NET ID does not exist, is inactive, or the Connected Banking is not enabled for the user, then a message appears.

- Press Y to proceed.
- Press A to Approve as Admin.

- Enter the Tally.NET ID and Password of the Account Administrator or owner for approval.

Once approved, either you or the user can link the mobile number to the Tally.NET ID and change the password, if it does not comply with the new password policy.
If you want to know how to access user access to Connected Banking on the Tally Solutions Customer Portal, then click here
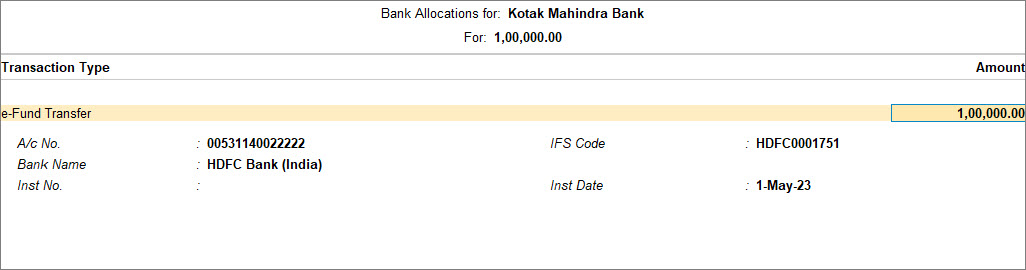
Connect Bank Accounts
When you connect to a specific Bank, a Connection ID gets generated. This is the reference ID for the connection initiated with the Bank.
Once the connection is successful, you get a list of account numbers with the matching Bank ledgers.
- Press Alt+Z (Exchange) > All Banking Options > Bank Connections.
If you have not logged in to Connected Banking already, then you will need to log in. - Press F6 (New Connection).
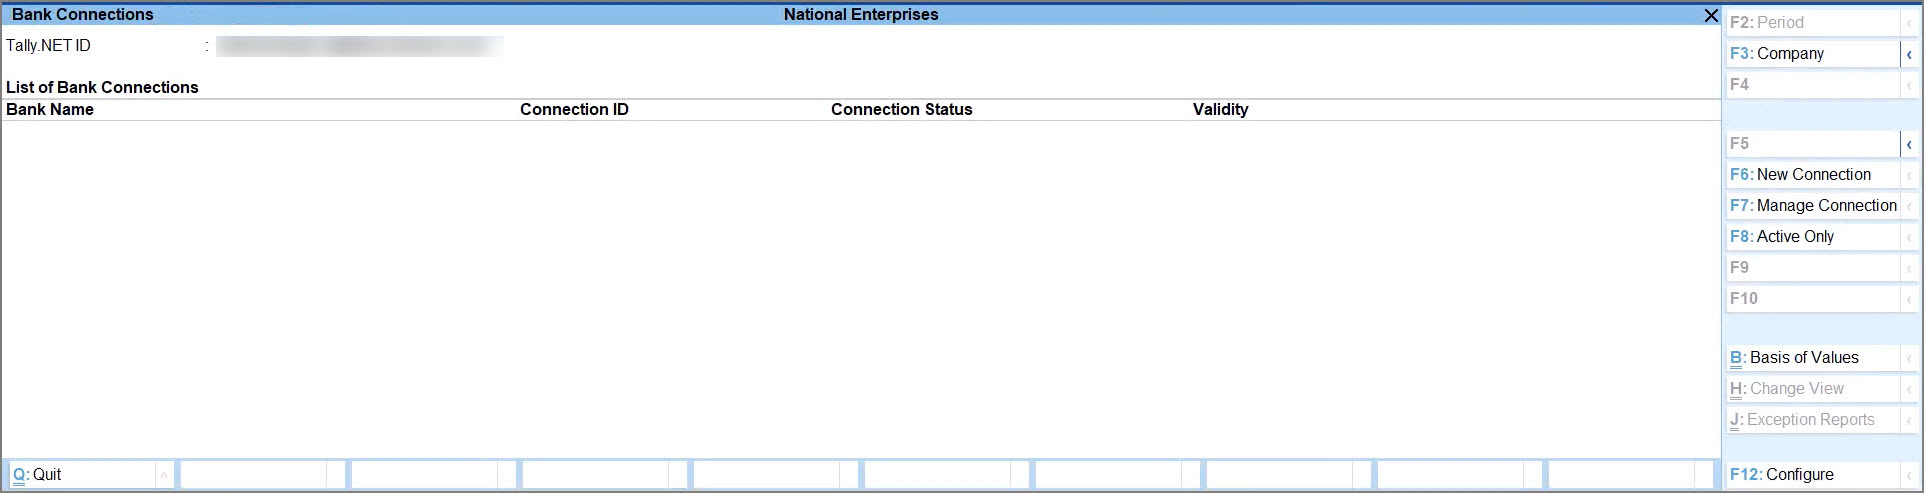
- Select the relevant bank.
A connection ID gets generated.
If there are connections pending for approval for the bank, then you will get a message.
In that case, you can press Y to proceed.- If you are an Axis Bank customer, refer to Connection with Axis Bank.
- If you are a Kotak Mahindra Bank customer, refer to Connection with Kotak Mahindra Bank.
- In the Connect to Bank screen, press C (Connect).
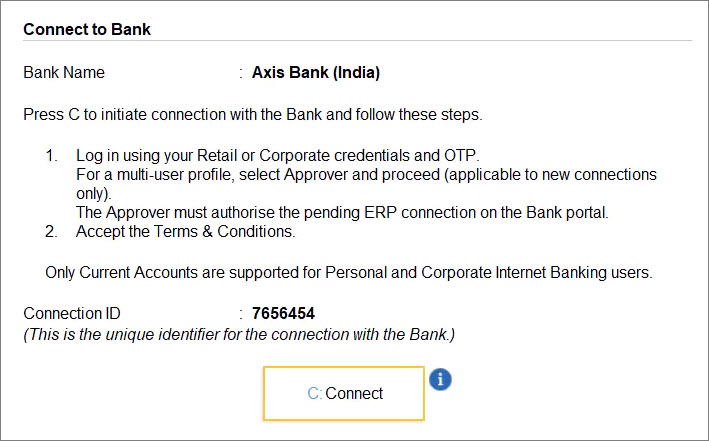
Consequently, you get redirected to the respective bank portal.
Once you establish the connection with the bank on the portal, you can refresh the status. - Press R (Refresh Status).
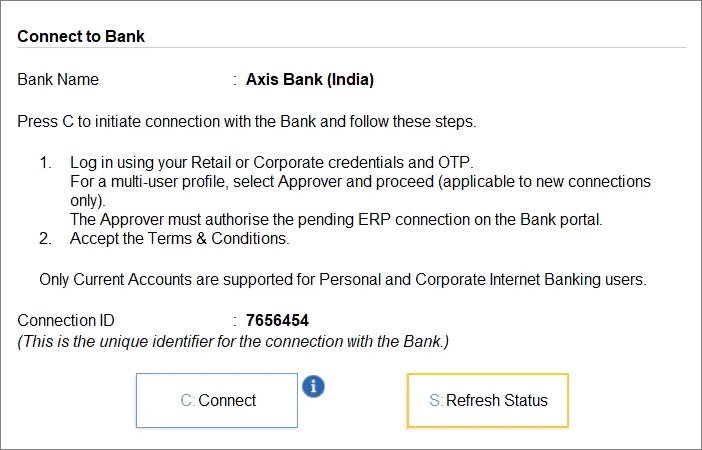
The status of the connection gets displayed in the Bank Connections report as Connected.
Once you establish the connection with the bank, the bank accounts get linked. If there are ledgers matching the bank accounts, then the ledgers also get displayed.
- To view the linked bank accounts, press Shift+Enter on the relevant Bank row.

After the one-time setup, you can log in to Connected Banking at any point in time. Thereafter, using Connected Banking in TallyPrime, you can:
- Get Bank Balance.
- Get Statement.
If you are not logged in, then you will need to log in with Tally.NET ID, password, and OTP.
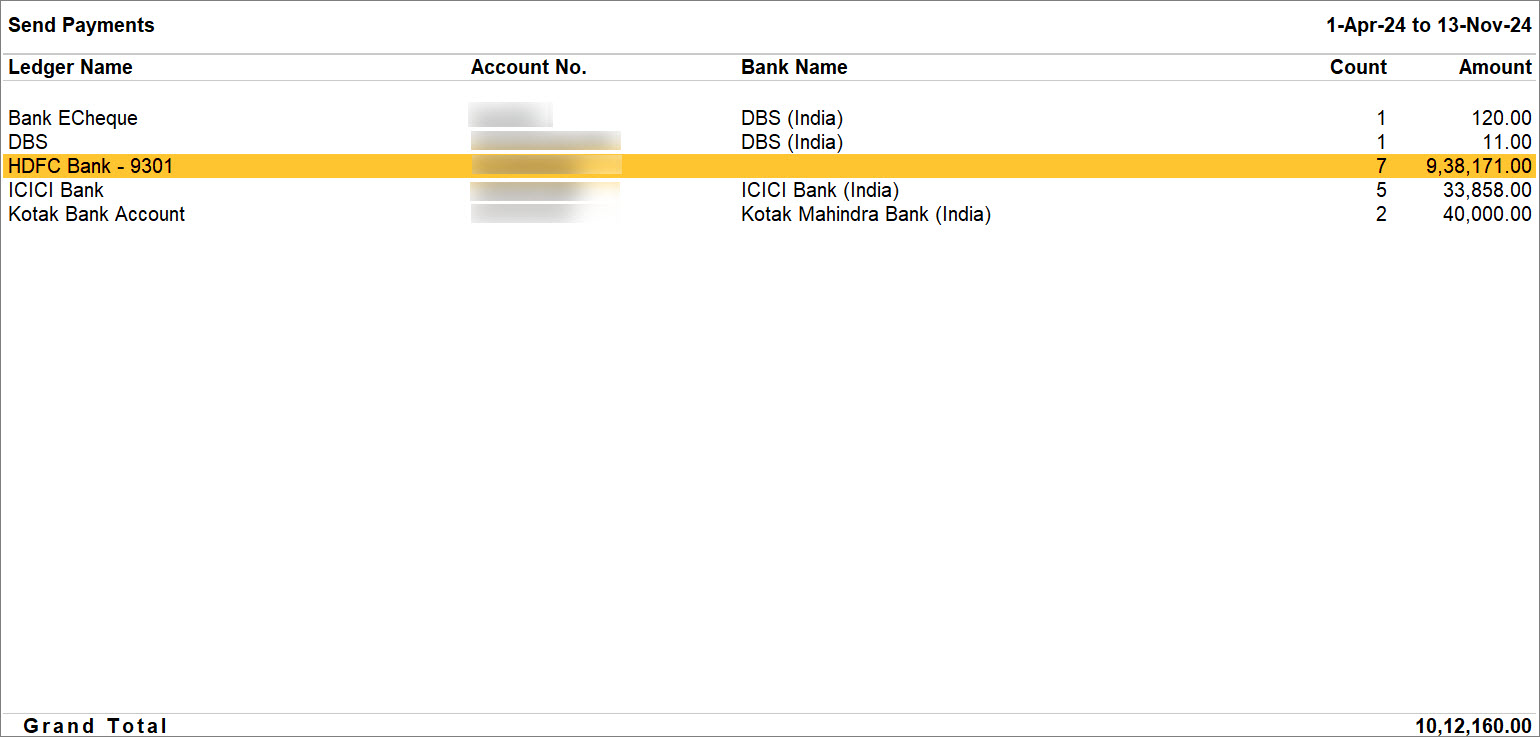
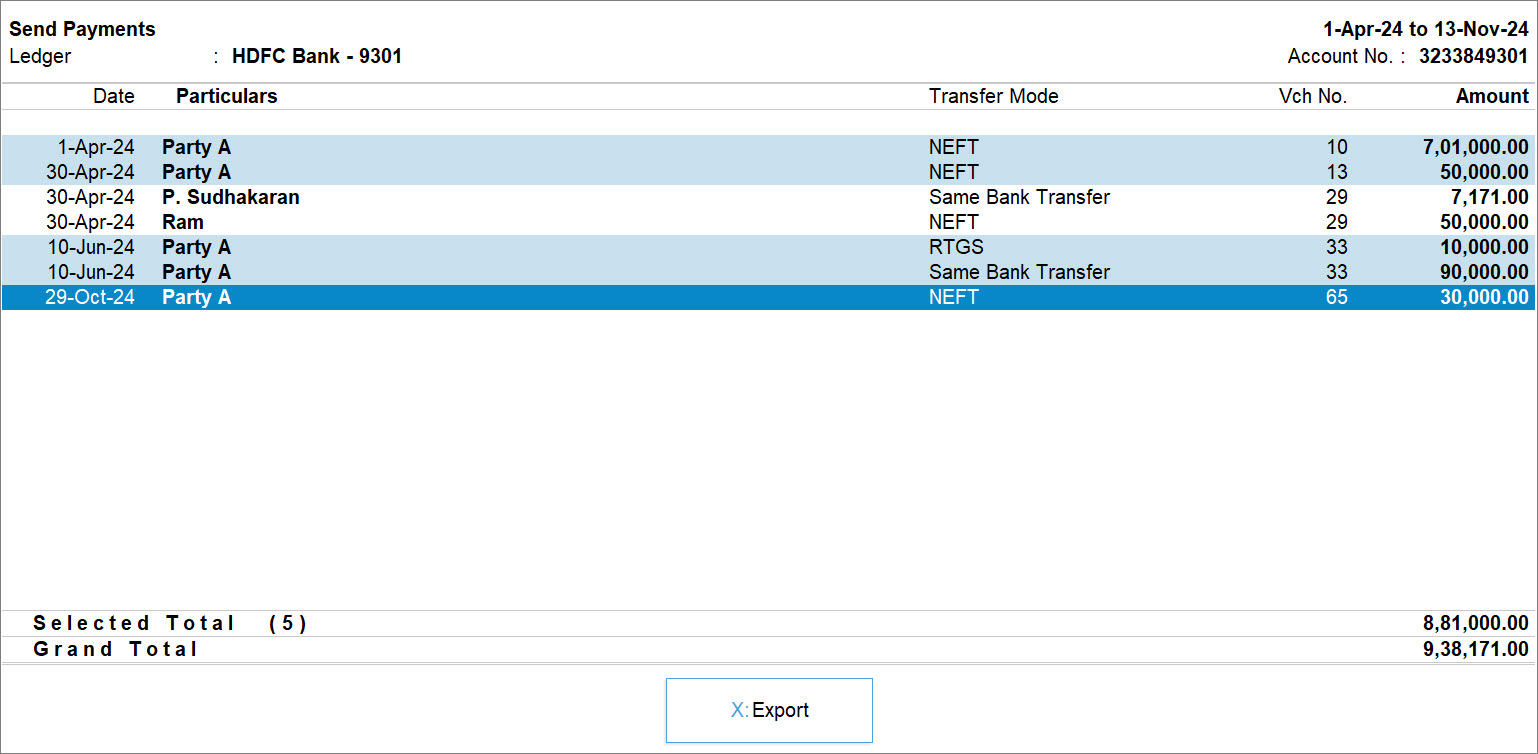
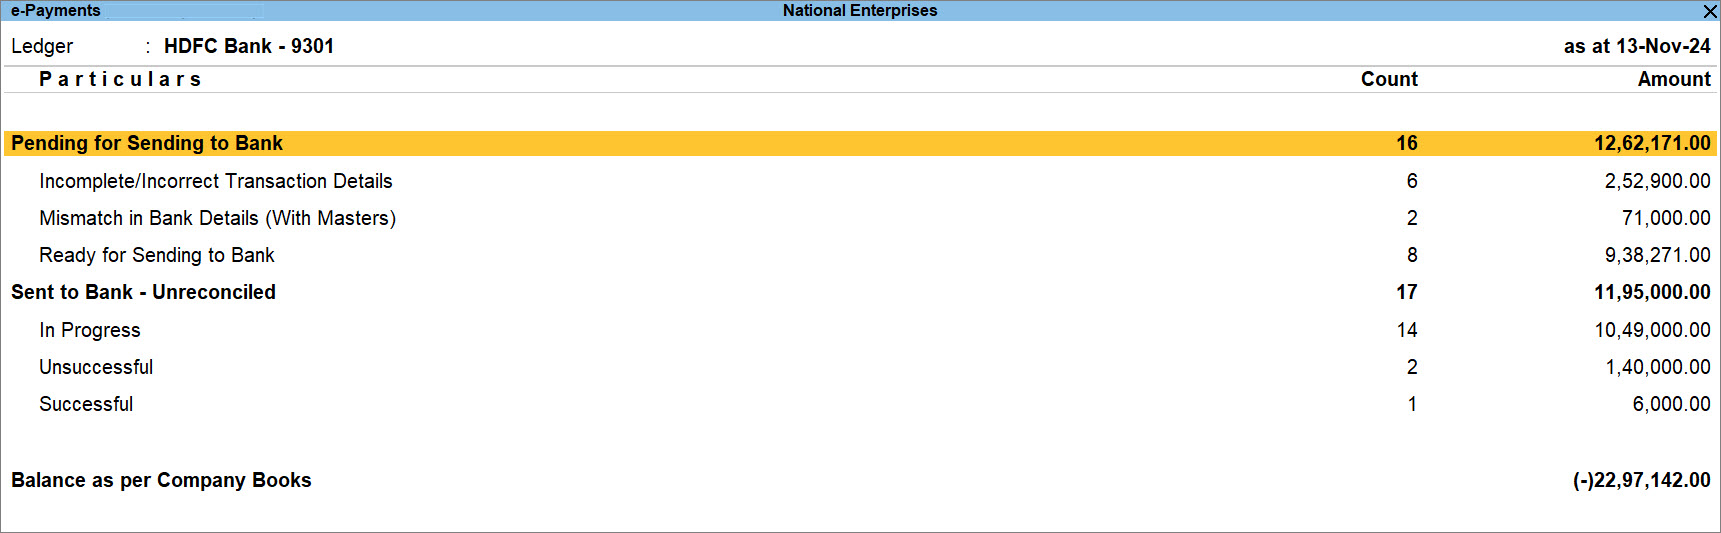
Get Bank Balance
With Connected Banking, you get to know your Bank Balance in a matter of seconds and that too, right from TallyPrime. This helps you decide the account using which you can send payments to your suppliers. You only need to ensure that you are logged in to Connected Banking.
- Press Alt+Z (Exchange) > Get Balance.
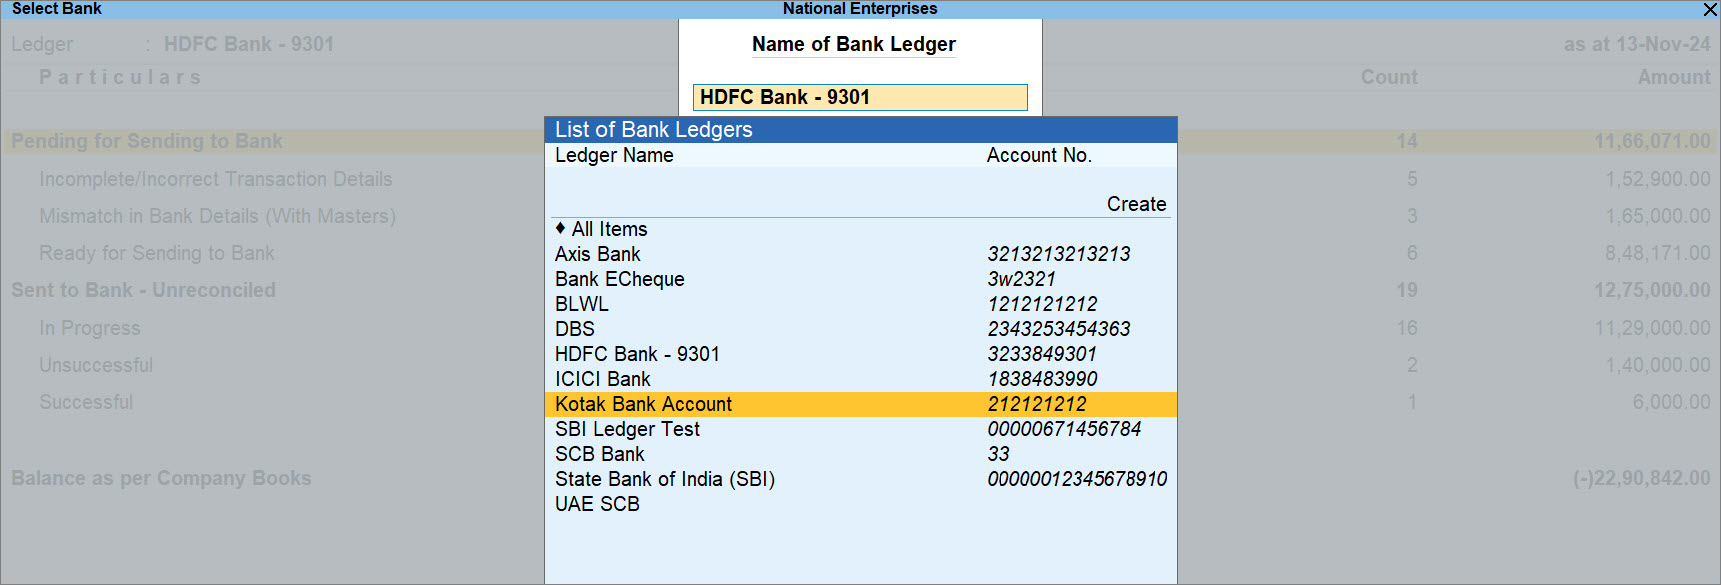
Alternatively, press Alt+Z (Exchange) > All Banking Options > Get Balance. - Select one or more bank accounts to get the balance.
- Press B (Get Balance).
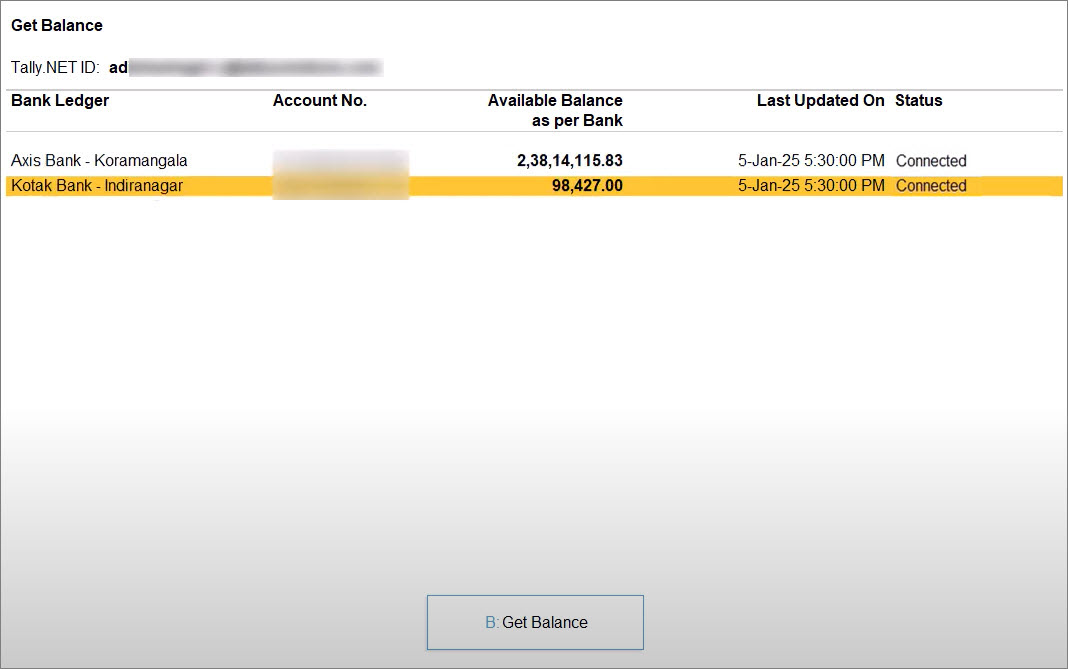
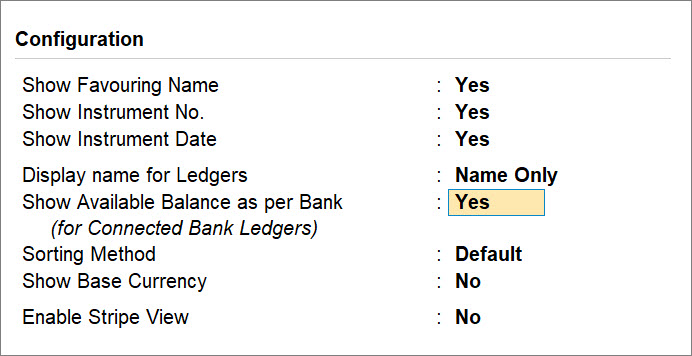
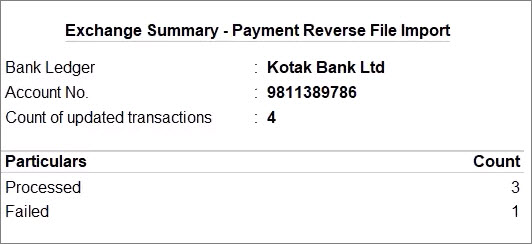
If the balance is fetched for multiple bank accounts and the process fails for one or more bank accounts, then an Exchange Summary appears.
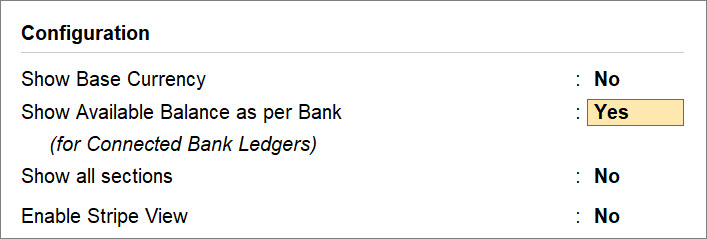
You can further configure this report to view Bank Name and Ledger Balance as per Books for comparison with the balance as per bank.
- Press F12 (Configure).
- Show Bank Name: Yes.
- Show Ledger Balance as per Book: Yes.

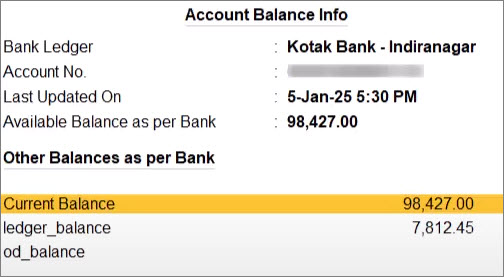
Furthermore, while you get to know the balance of your bank accounts, you can view other balances sent from the bank.
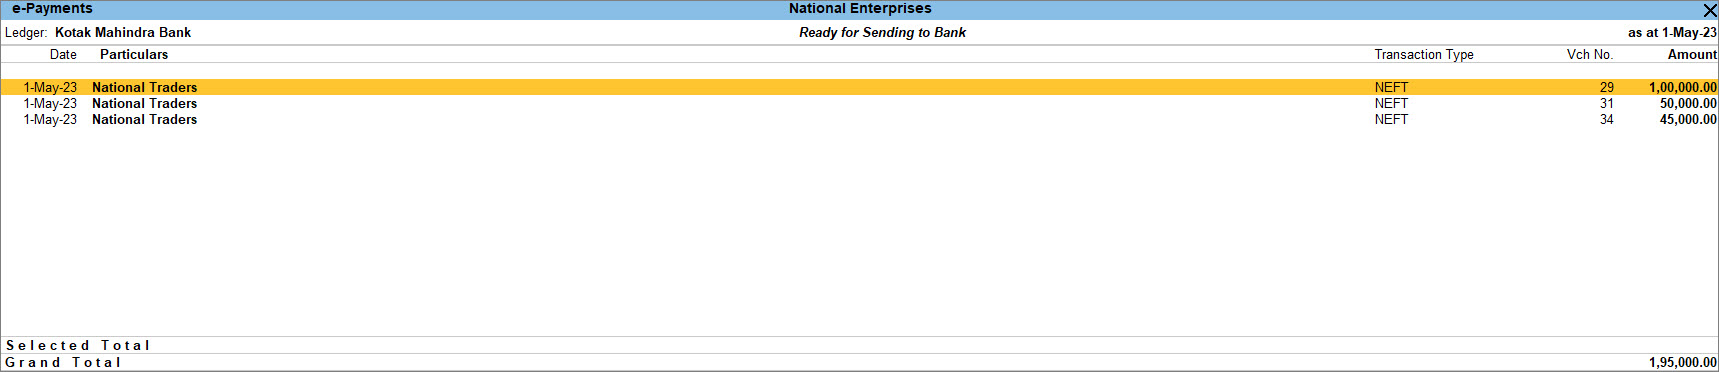
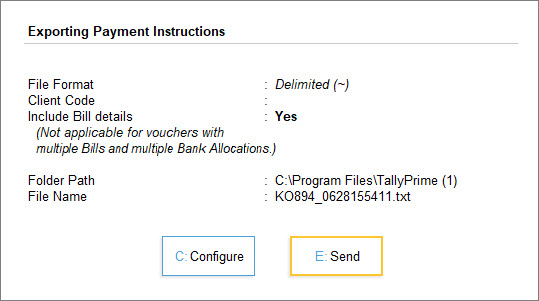
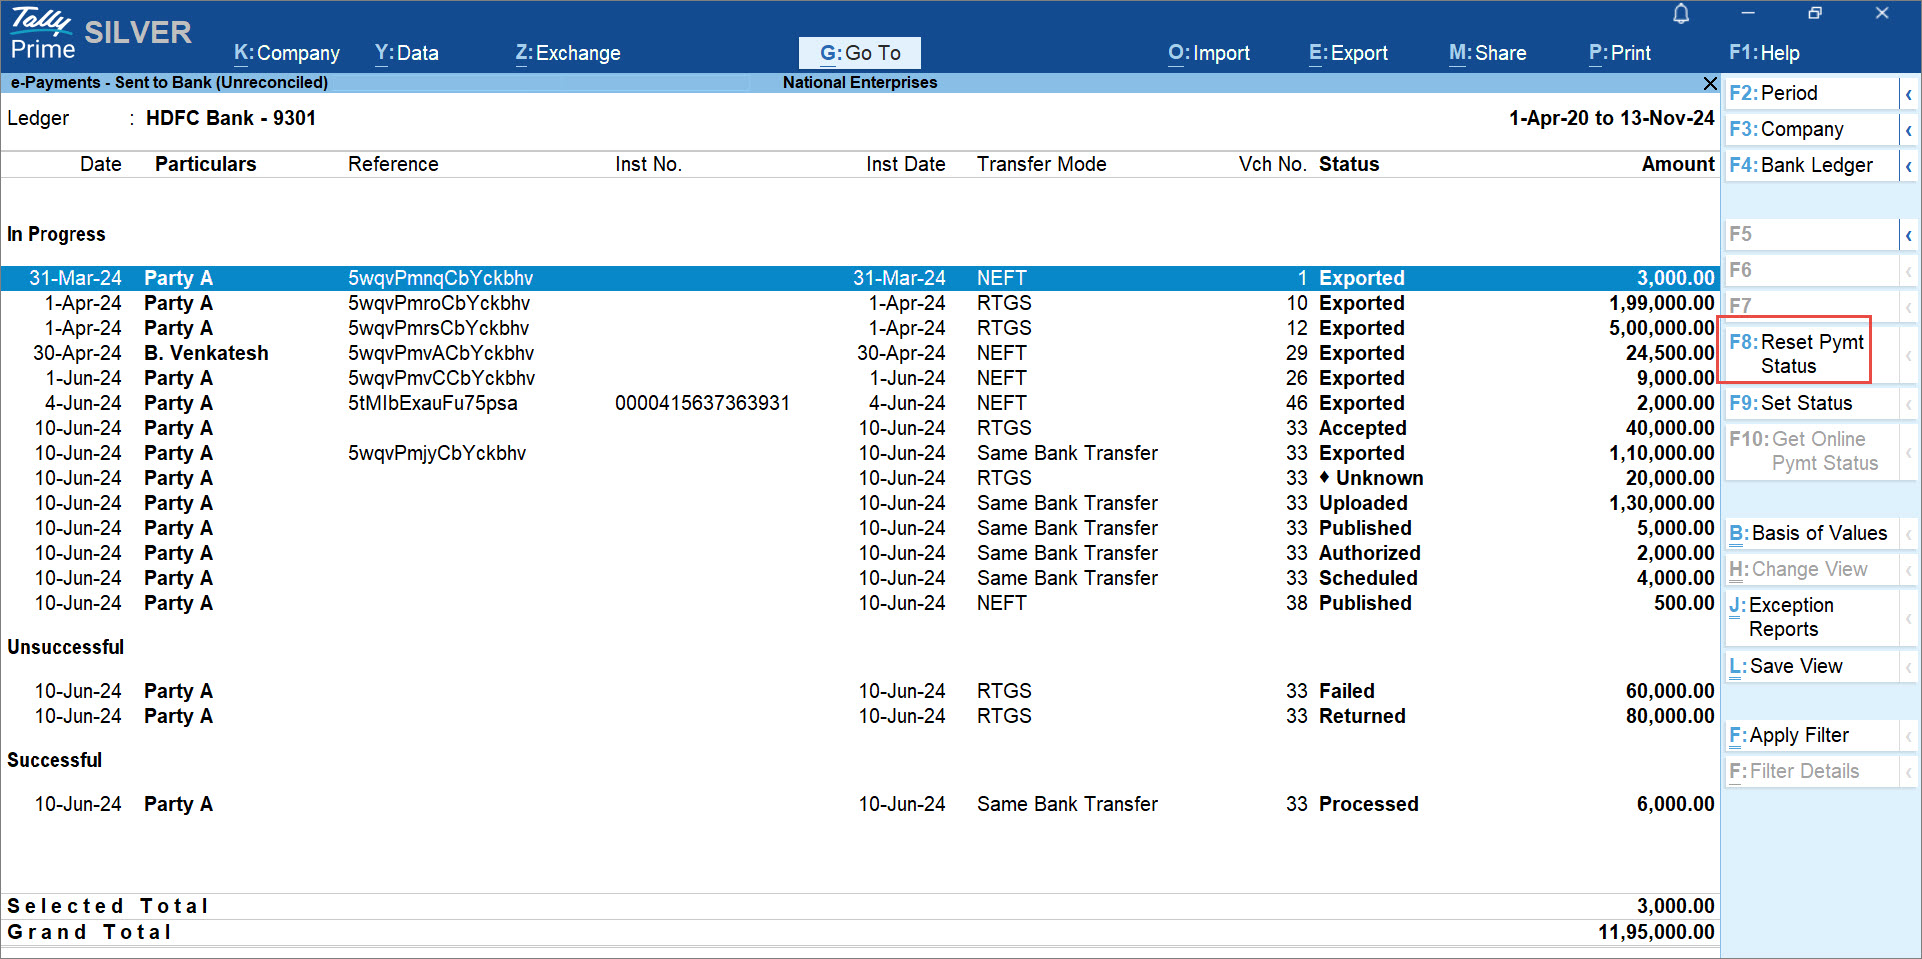
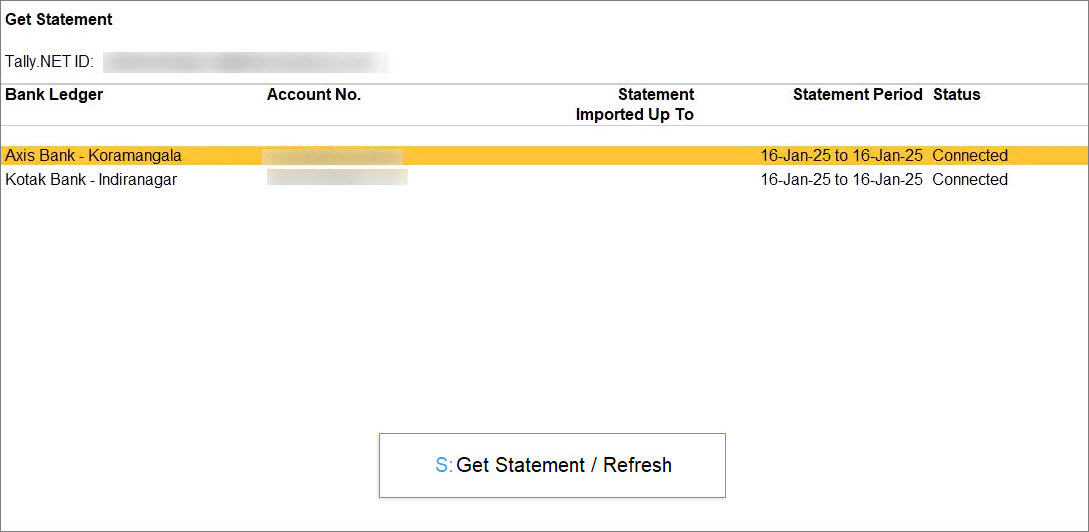
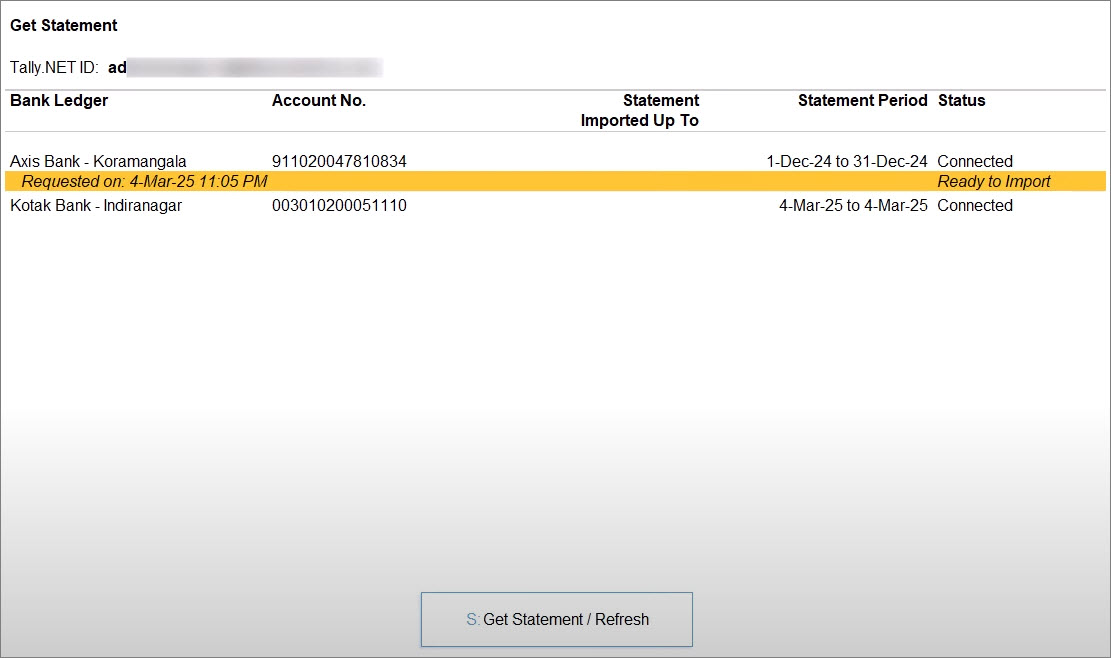
Get Bank Statement
With Connected Banking, you can seamlessly get bank statements. You can then use the bank statements to reconcile the transactions in books.
- Press Alt+Z (Exchange) > All Banking Options > Get Statement.
- Set the period for which you want to get the statement.
- Select the bank ledger and press Alt+S (Set Statement Period).
At a time, you can select only one bank account to get bank statement.
- Enter the From and To dates and press Enter.
- Select the bank ledger and press Alt+S (Set Statement Period).
- Press S (Get Statement).
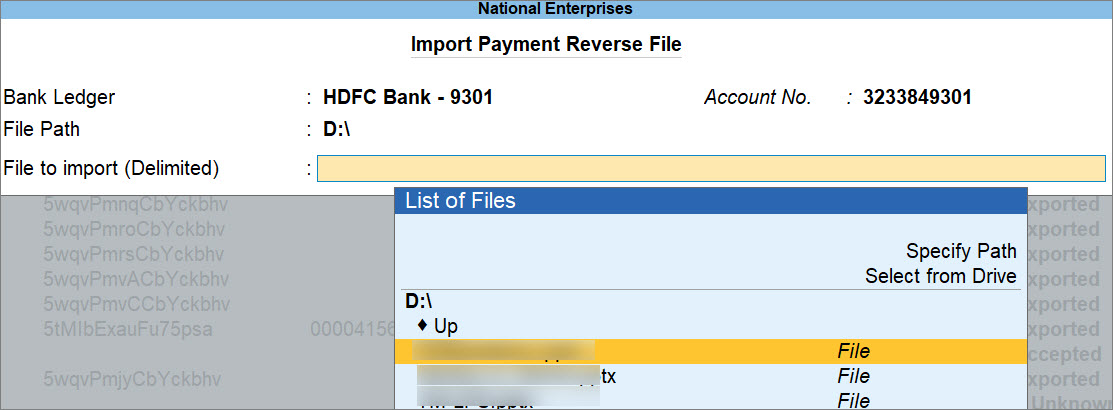
- Import the statement.
- Select the request that is ready to import.
- Press S to import the statement.
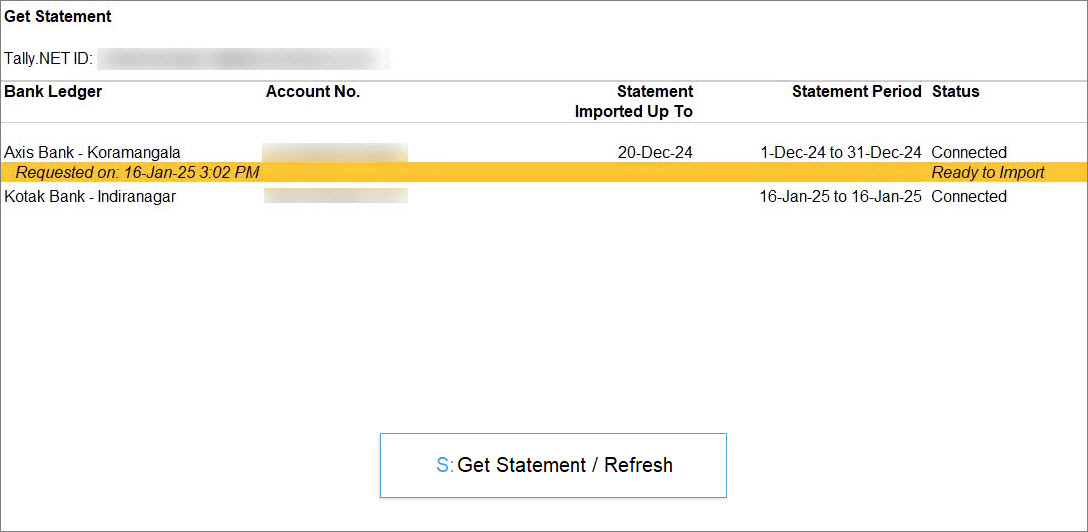
The statement becomes a part of your Company data.
You can view the transactions from the imported statements in the Imported Bank Data and Bank Reconciliation reports.
If you are not using Connected Banking services, then you can import bank statements to perform auto reconciliation.
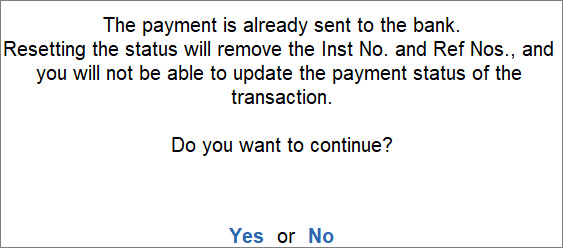
Delete Statement Request
You might want to delete a statement request when it was requested for the wrong period.
- Bring the cursor to the request.
- Press Alt+R (Delete Request).
- Press Y to confirm.
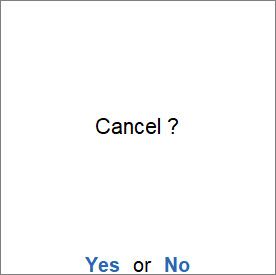
The request gets deleted.
Reset Bank Statement Data
You can reset the bank statement data when:
- You have imported the statement for a wrong period.
- You have already reconciled your transactions. Therefore, you do not want the imported bank statements in your Company data anymore.
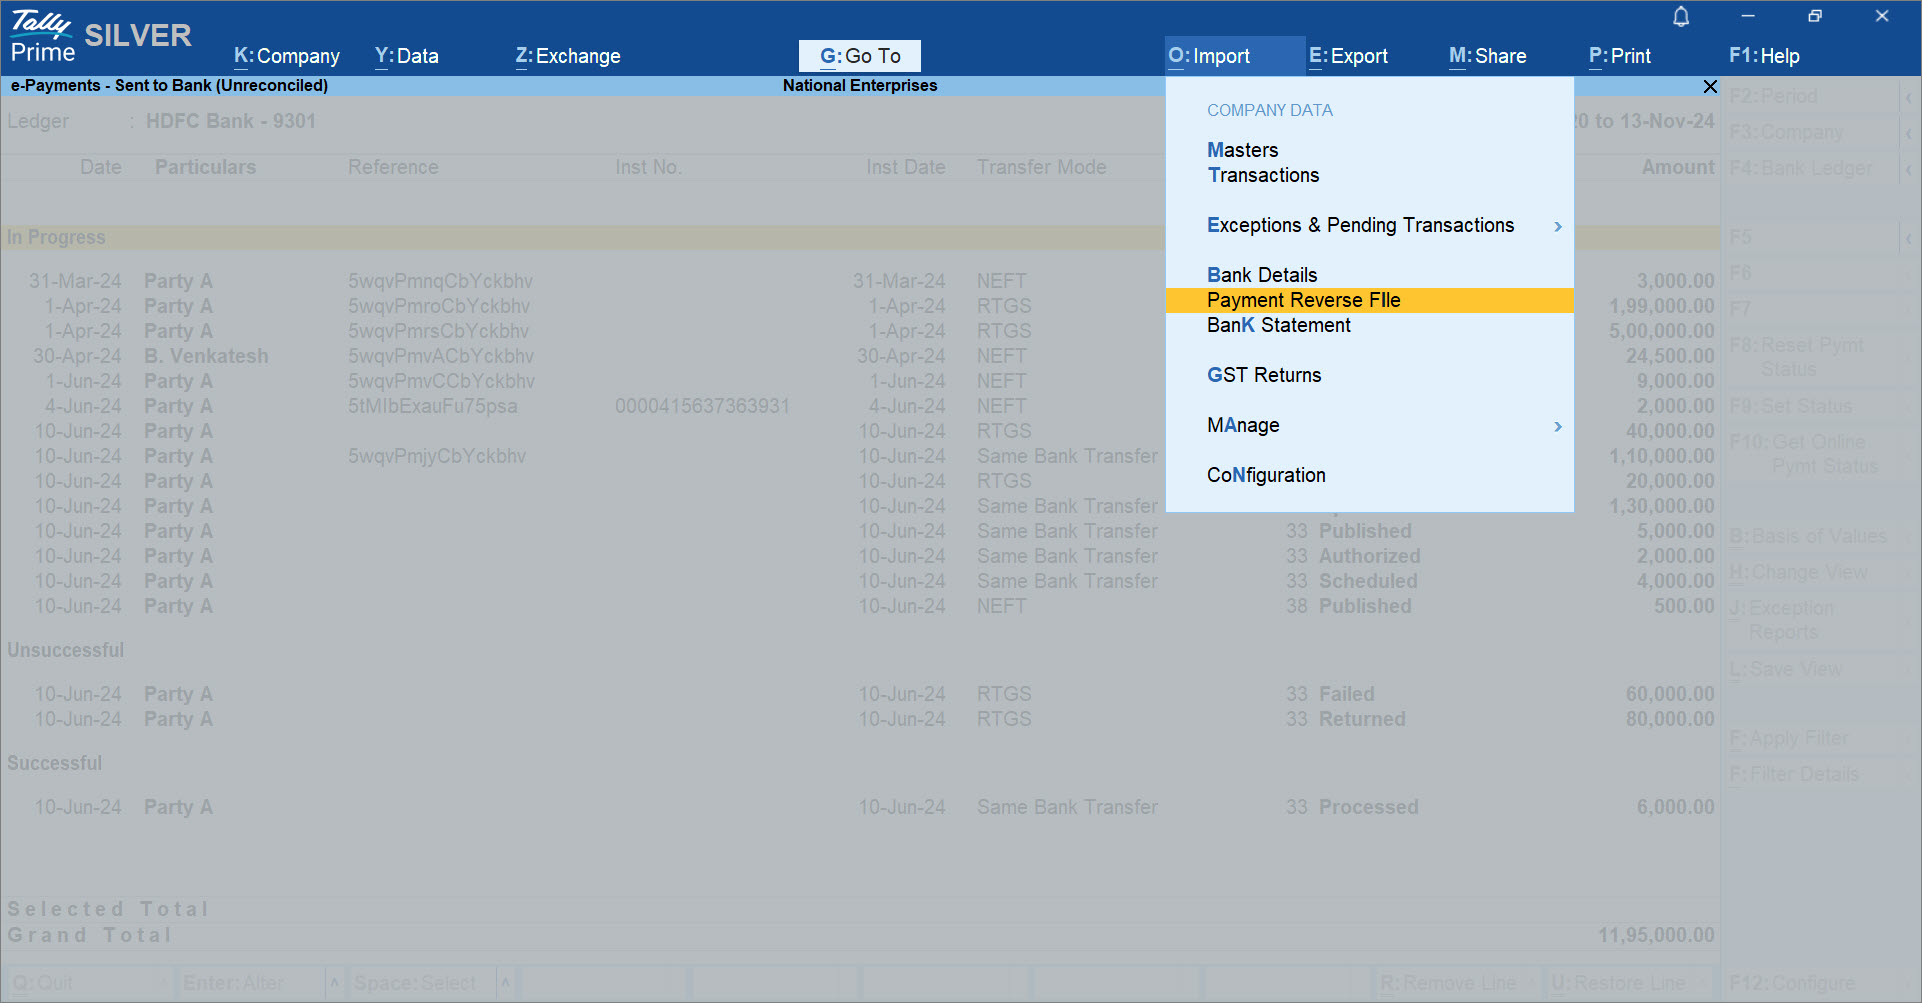
- Press F1 (Help) > Troubleshooting.
- Select Reset Bank Statement Data and press Enter.
- In the Reset Bank Statement Data screen, select the Bank Ledger.
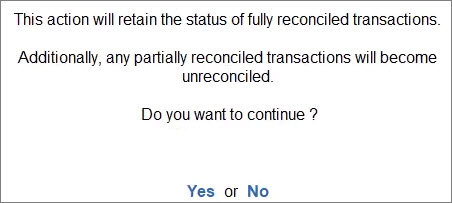
- Retain Reconciliation Status: Yes.
The reconciliation status of the fully reconciled transactions gets retained. However, if there are any partially reconciled transactions, then their status becomes Unreconciled.
If the option is set to No, then the statement data will get deleted and transactions reconciled or even partially reconciled via linking will become Unreconciled. - Enter the From and To dates.
The Bank Statement data will get cleared for the specified status. - Take a backup of the Company data, if needed.
- Backup Company Data before Reset: Yes.
- Backup Destination Path: Select or specify the folder path and press Enter.
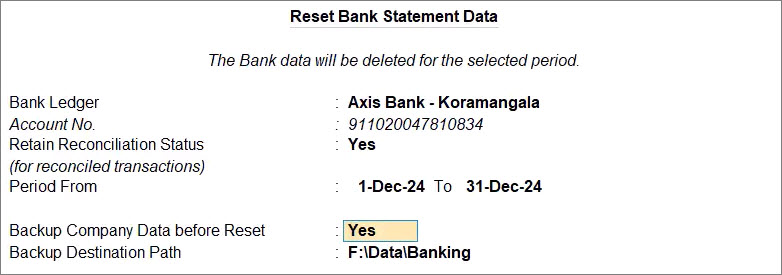
- Press Y to confirm.
The bank statement data gets cleared.
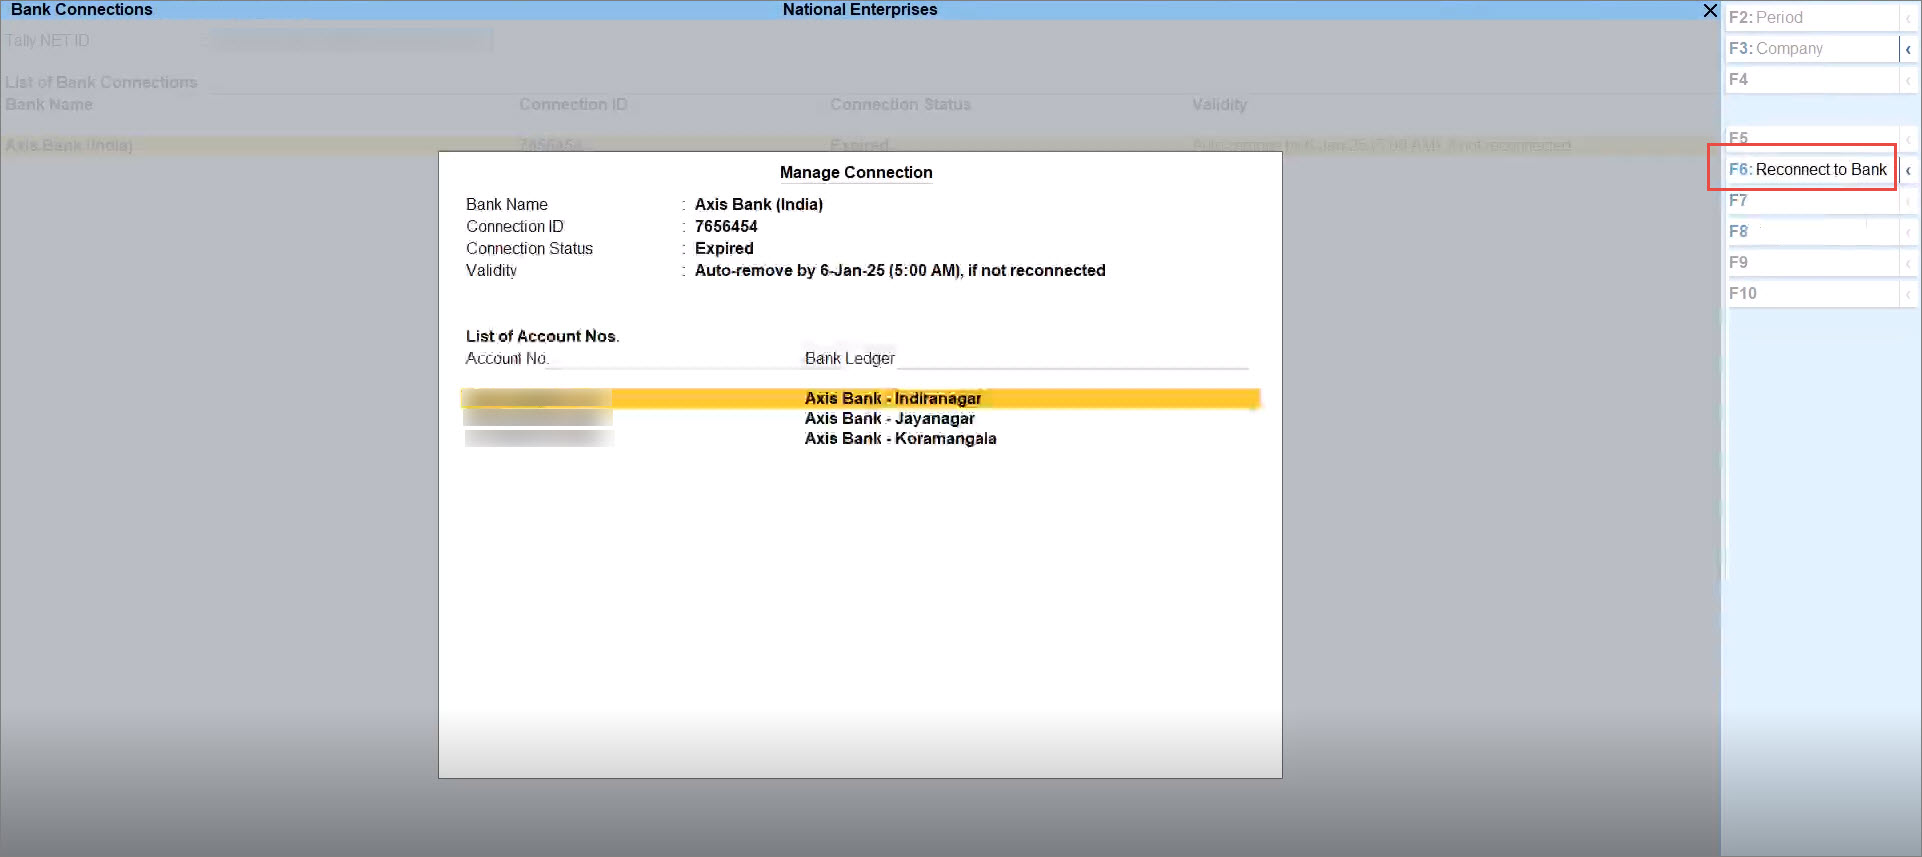
Reconnect/Disconnect Bank
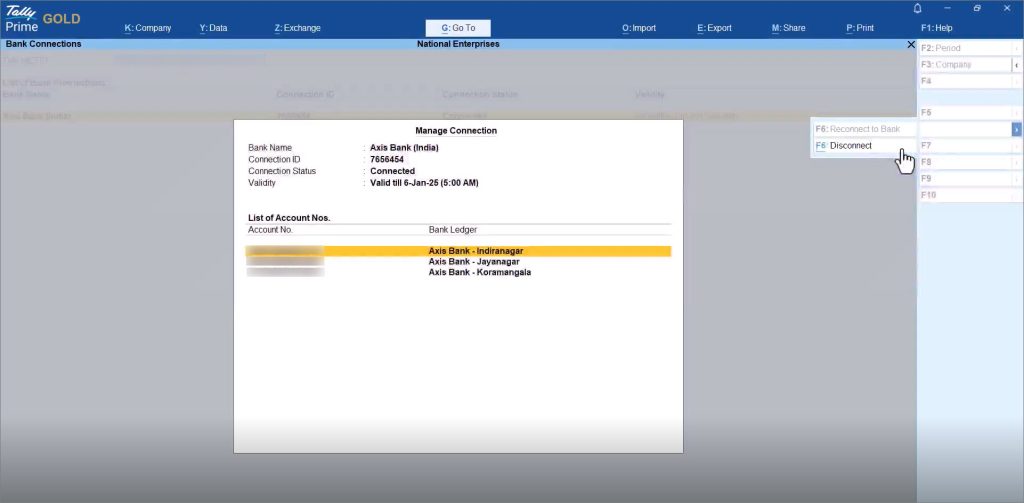
The facility to manage bank connections allows you to reconnect or disconnect from your bank, whenever needed.
- Select the bank connection, and press Enter or F7 (Manage Connection).
Reconnect Bank Accounts
You can reconnect to the bank using an existing Connection ID in the following scenarios:
- The connection is still in progress.
- The connection has expired when:
- The connection has crossed its validity.
- The mobile number has been changed.
- In the Manage Connection screen, press F6 (Reconnect to Bank).
- In the Reconnect to Bank screen, press C (Connect).
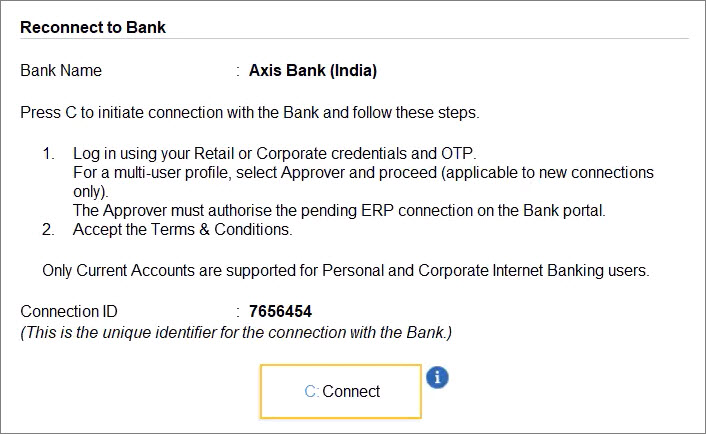
Consequently, you get redirected to the bank portal.
Refer to Reconnect with Axis Bank or Reconnect with Kotak Mahindra Bank to know more.
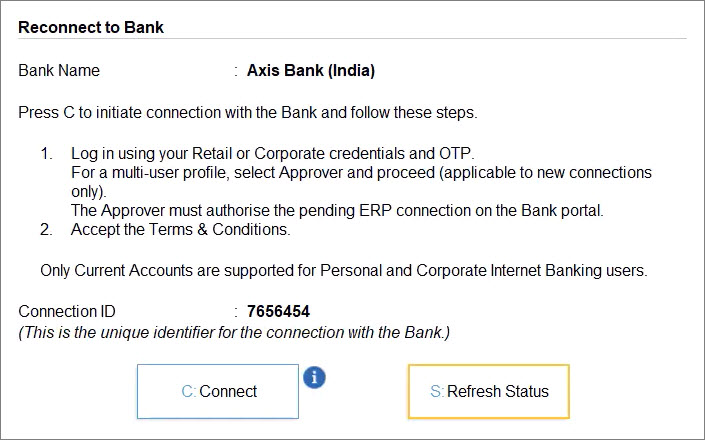
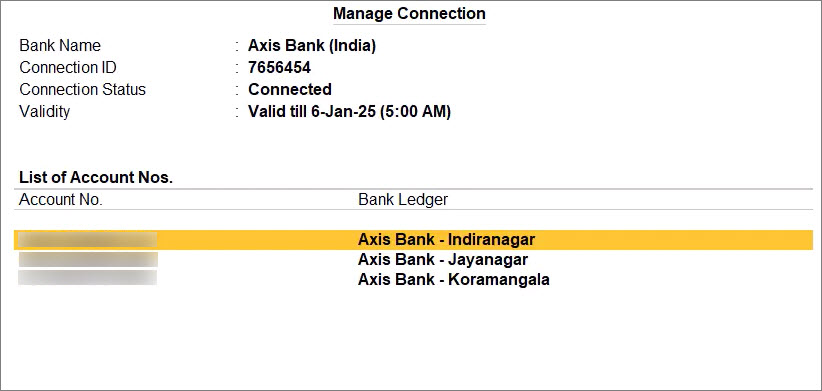
Once you establish the connection with the bank on the portal, you can refresh the status. - Press R (Refresh Status).
The Bank Accounts get connected.
Disconnect Bank Accounts
Some of your bank accounts might be dormant. So, you might not want to use the bank accounts through Connected Banking. When you do not want to use bank accounts of a specific bank, you can disconnect from the bank.
- In the Manage Connection screen, press Alt+F6 (Disconnect).
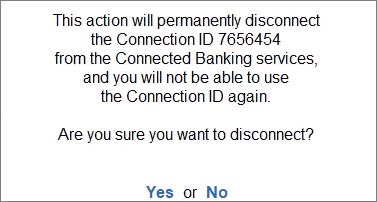
- In the Disconnect from Bank screen, press D (Disconnect).
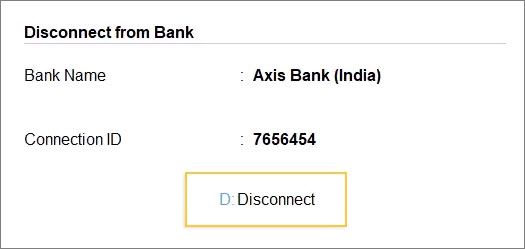
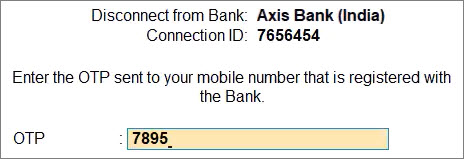
- Press Y to disconnect from the bank.
In the case of Axis Bank, you will need to enter the OTP received on the mobile number registered with the Bank.
However, in the case of Kotak Mahindra Bank, the OTP is not required.

The Bank Accounts get disconnected.

Log In/Log Out from Connected Banking
You can log in using your Tally.NET ID and password at any point in time.
Log in to Connected Banking
- Press Alt+Z (Exchange) > All Banking Options > Login & Logout.
- Enter your Tally.NET ID in the Log In to Connected Banking screen.
- Enter your Tally.NET password.
- Enter the OTP received on your mobile number.
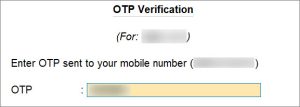
If you do not receive the OTP, press Alt+R (Resend OTP).
Once you enter the OTP, you get logged in to the Connected Banking services.
Log in when the session is expired or inactive
A Connected Banking session expires after 24 hours. In such a case, you can enter your Tally.NET password and OTP to log in.
Moreover, your Connected Banking session might become inactive in three cases:
- No activity is performed for more than 15 minutes.
- The Company is shut and opened in another instance of TallyPrime.
- TallyPrime is closed.
In case of an inactive connection, you need to enter just your Tally.NET password to log in.
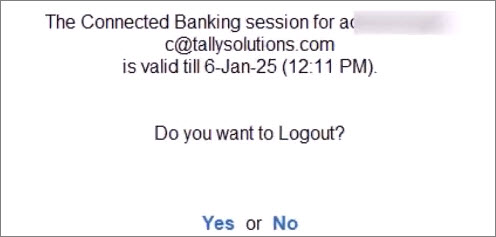
Log Out from Connected Banking
When you are not using any Connected Banking facility, you can log out.
- Press Alt+Z (Exchange) > All Banking Options > Login & Logout.
- Press Y to log out.
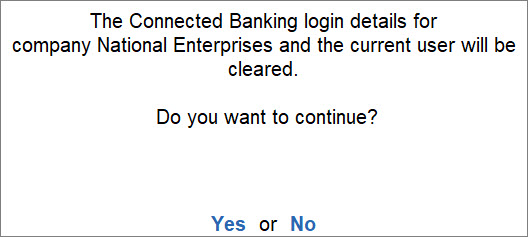
Reset Connected Banking Login
When you are not able to log out of Connected Banking, you can reset the Connected Banking login.
- Press F1 (Troubleshooting) > Reset Connected Banking Login and press Enter.
- Press Y to confirm.
Change Password for Connected Banking
You will need to change your password if it does not adhere to the new password policy. Your new Password should either be a 6-10 digit PIN or contain at least 8 characters with one uppercase letter, one lowercase letter, a number, and a special character.
- Enter the Old password.
- Enter the New password.
- Confirm the New password.
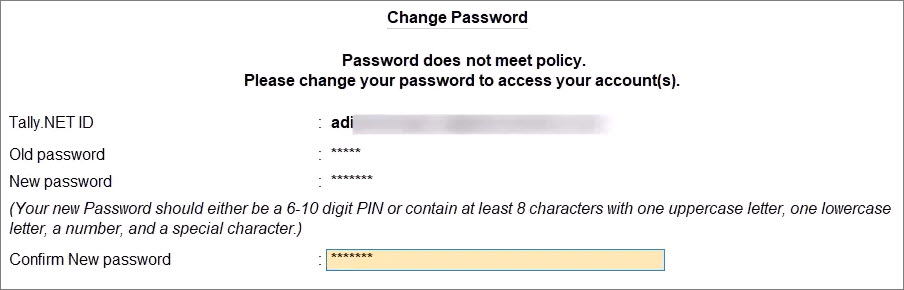
- Press Enter.
The password gets changed.