You can start using the TallyPrime features in a matter of minutes. All you need to do is download the setup file, install TallyPrime, and activate the license.
If you are a new user, create a company, and start recording your transactions. You can create all ledgers needed to maintain your accounts while recording transactions. In case you want to try TallyPrime before buying it, or you are a student, you can use the Educational version.
If you are using an earlier version of Tally, upgrade to TallyPrime, and continue your business as usual.
Download and Install TallyPrime
You can download the application setup from Tally Solutions website. After downloading the setup files, install the application on your computer. Installation steps remain the same regardless of the TallyPrime edition you have purchased.
You can install TallyPrime on any computer with 64-bit edition of Microsoft Windows 7 or later.
- Download the setup files.
- Go to https://tallysolutions.com/download/.
- Click Download.
- Select the folder where you want to save the setup.exe file.
- Click Save.
- Install TallyPrime.
- Double-click setup.exe.
- Double-click Install New.
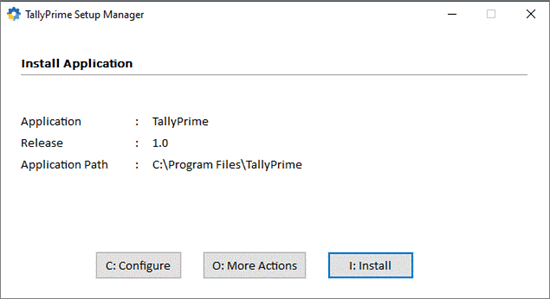
- Configure Application Path, if needed.
By default, the application will be installed at C:\Program Files\TallyPrime.- Click Configure.
- Double-click Application Path.
- Click … and change the path as needed.
Note: If you are already using Tally.ERP 9, it is recommended that you install TallyPrime in a different folder. This will allow you to use both the products simultaneously, if needed.
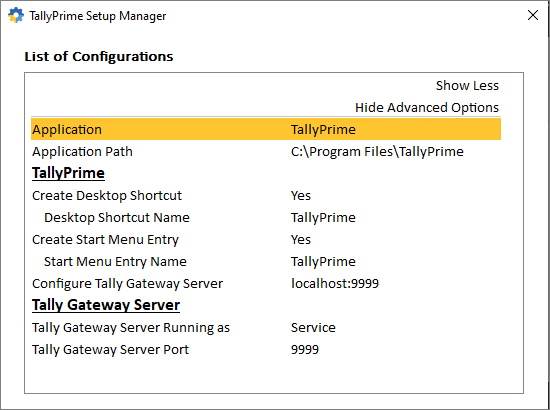
- Close the List of Configurations window.
- Click Install.
The application gets installed, and the following window opens.
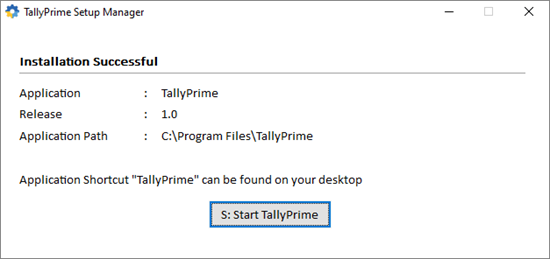
- Click Start TallyPrime to launch TallyPrime.
You can activate the license and start using TallyPrime.
New Users – Activate License
If you have purchased a single user Silver License, you can activate the license on one computer. If you have a multiuser Gold License, you need to activate the license on one computer on the LAN, and configure all other installations using the same license.
Activate New License
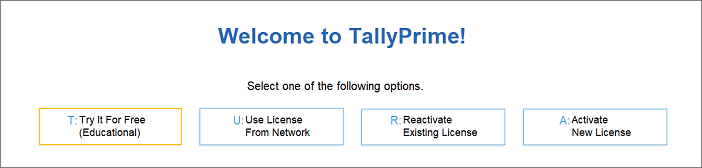
- Start your TallyPrime. The Welcome to TallyPrime screen appears.
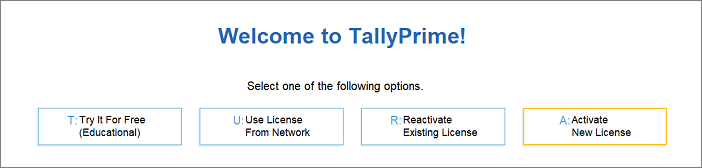
- Click Activate New License.
- If you have a Single-Site license, enter your Serial Number, Activation Key, and Administrator e-mail ID.
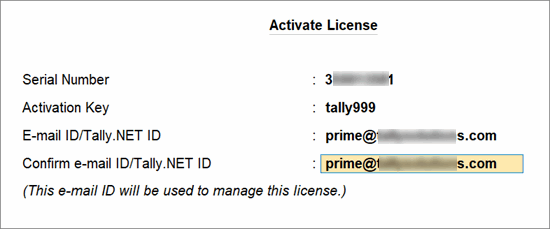
Note: The e-mail ID provided here will be linked to your account, and used for all future communication and licensing activities.
- Press Enter to proceed. The Unlock License screen appears.

- Enter the Unlock Key sent to your e-mail ID.
Note: If you have not received the unlock key, press F2 (Get Unlock Key).
- Press Enter to unlock your license.
After your license is unlocked, the following message appears.
After activating the license, you can create your first Company and start using TallyPrime for business transactions.
Depending on the size and scale of your business, you can have different setups.
Try it for free | Educational version
If you want to try TallyPrime before you buy, or just want to learn how to use the product, you can use the Educational version for free. You can try all features in the product, just with the restriction that voucher dates are limited to 1, 2 and 31.
- Start your TallyPrime. The Welcome to TallyPrime screen appears.
- Click Try It For Free.
You can start using TallyPrime in Educational mode. The window title will be in dark green colour and will show EDU under the product name.